Shopify
6 steps · Spark plan or higher
Connect your Shopify store to Gabbex
Connect your Shopify store to Gabbex so shoppers get answers from the same assistant you train — products, orders, and policies in one conversation.
You do not edit theme code
Install the Gabbex app from Shopify, connect your store in Gabbex, then switch on one Gabbex chat option in your theme's App embeds and paste the id from Deploy. That is usually all you need on the store side.
Assistant ready
Sign in to Gabbex and open the assistant that should talk to Shopify shoppers. Finish training and sources first if you can — you will reuse the same knowledge on the store.
Shopify requires a Spark, Core, or Scale plan in Gabbex.
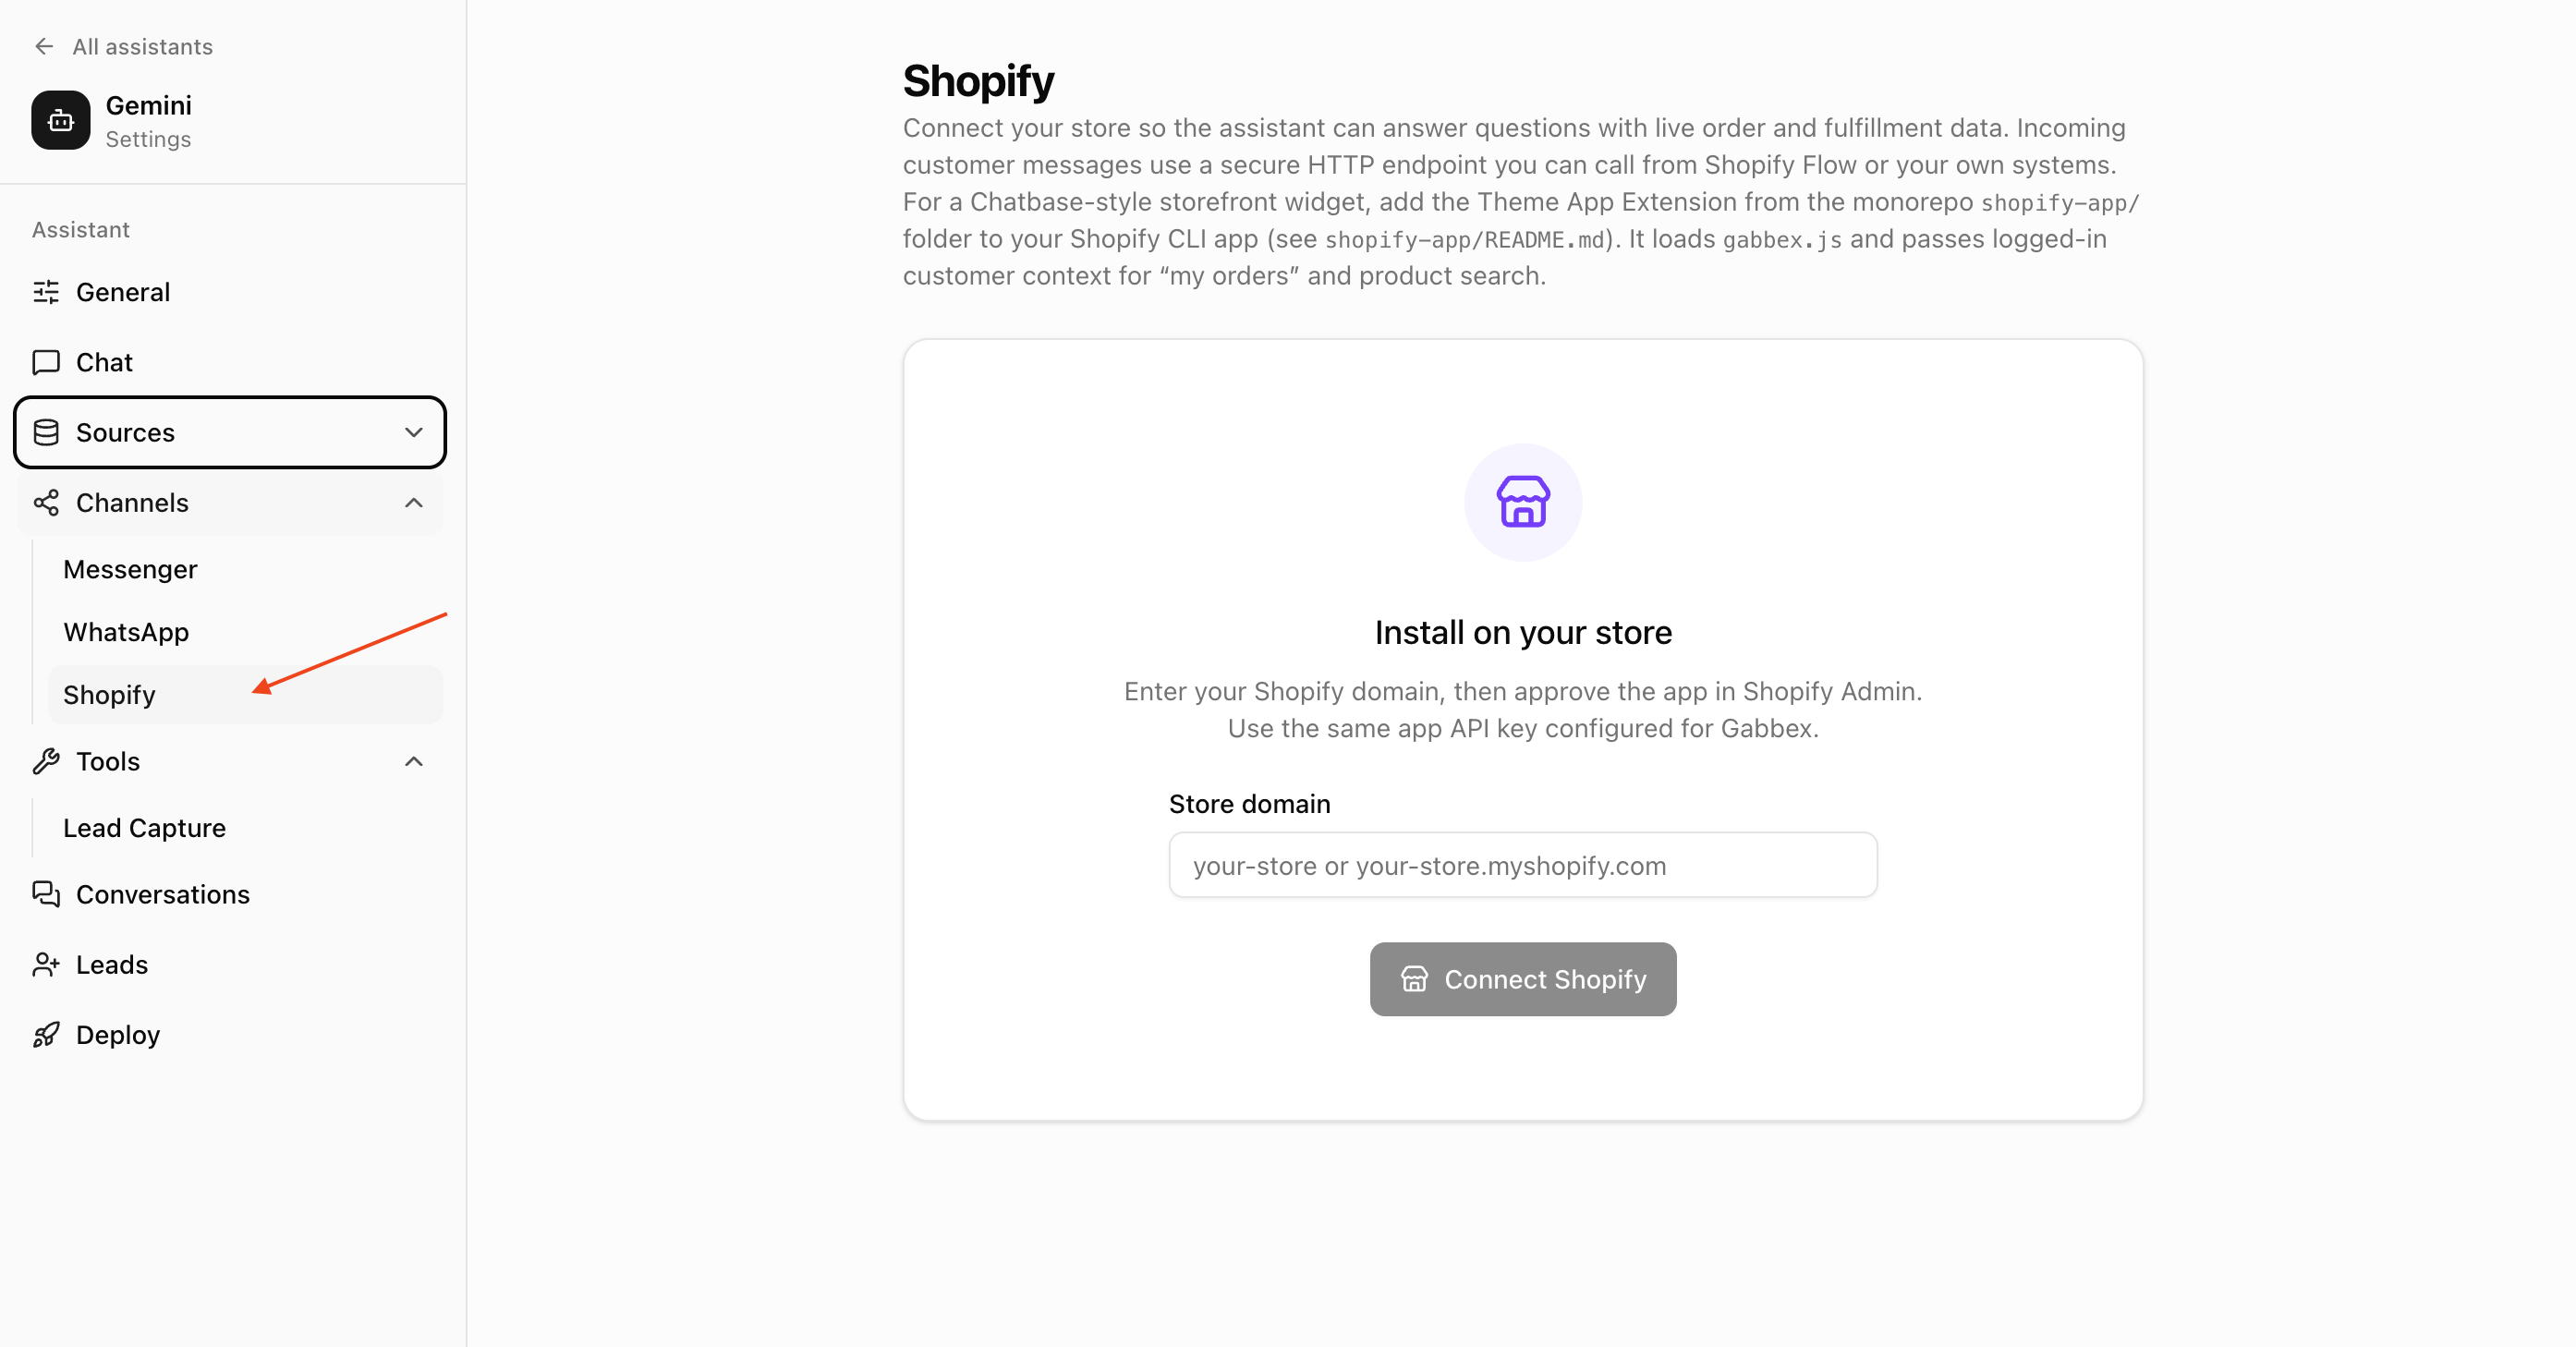
Open the Shopify channel and connect your store
In that assistant, go to Configure (or settings), then Channels → Shopify.
Enter your store name: the part before .myshopify.com (for example mystore for mystore.myshopify.com).
Click Connect Shopify. Shopify opens — sign in as a store admin, review permissions, and click Install / Approve. When done, your browser returns to Gabbex and the channel should show connected.
Edit your theme
In Shopify Admin, go to Online Store → Themes. Find the theme customers see (usually marked as your current theme), then click Customize. That opens the theme editor.
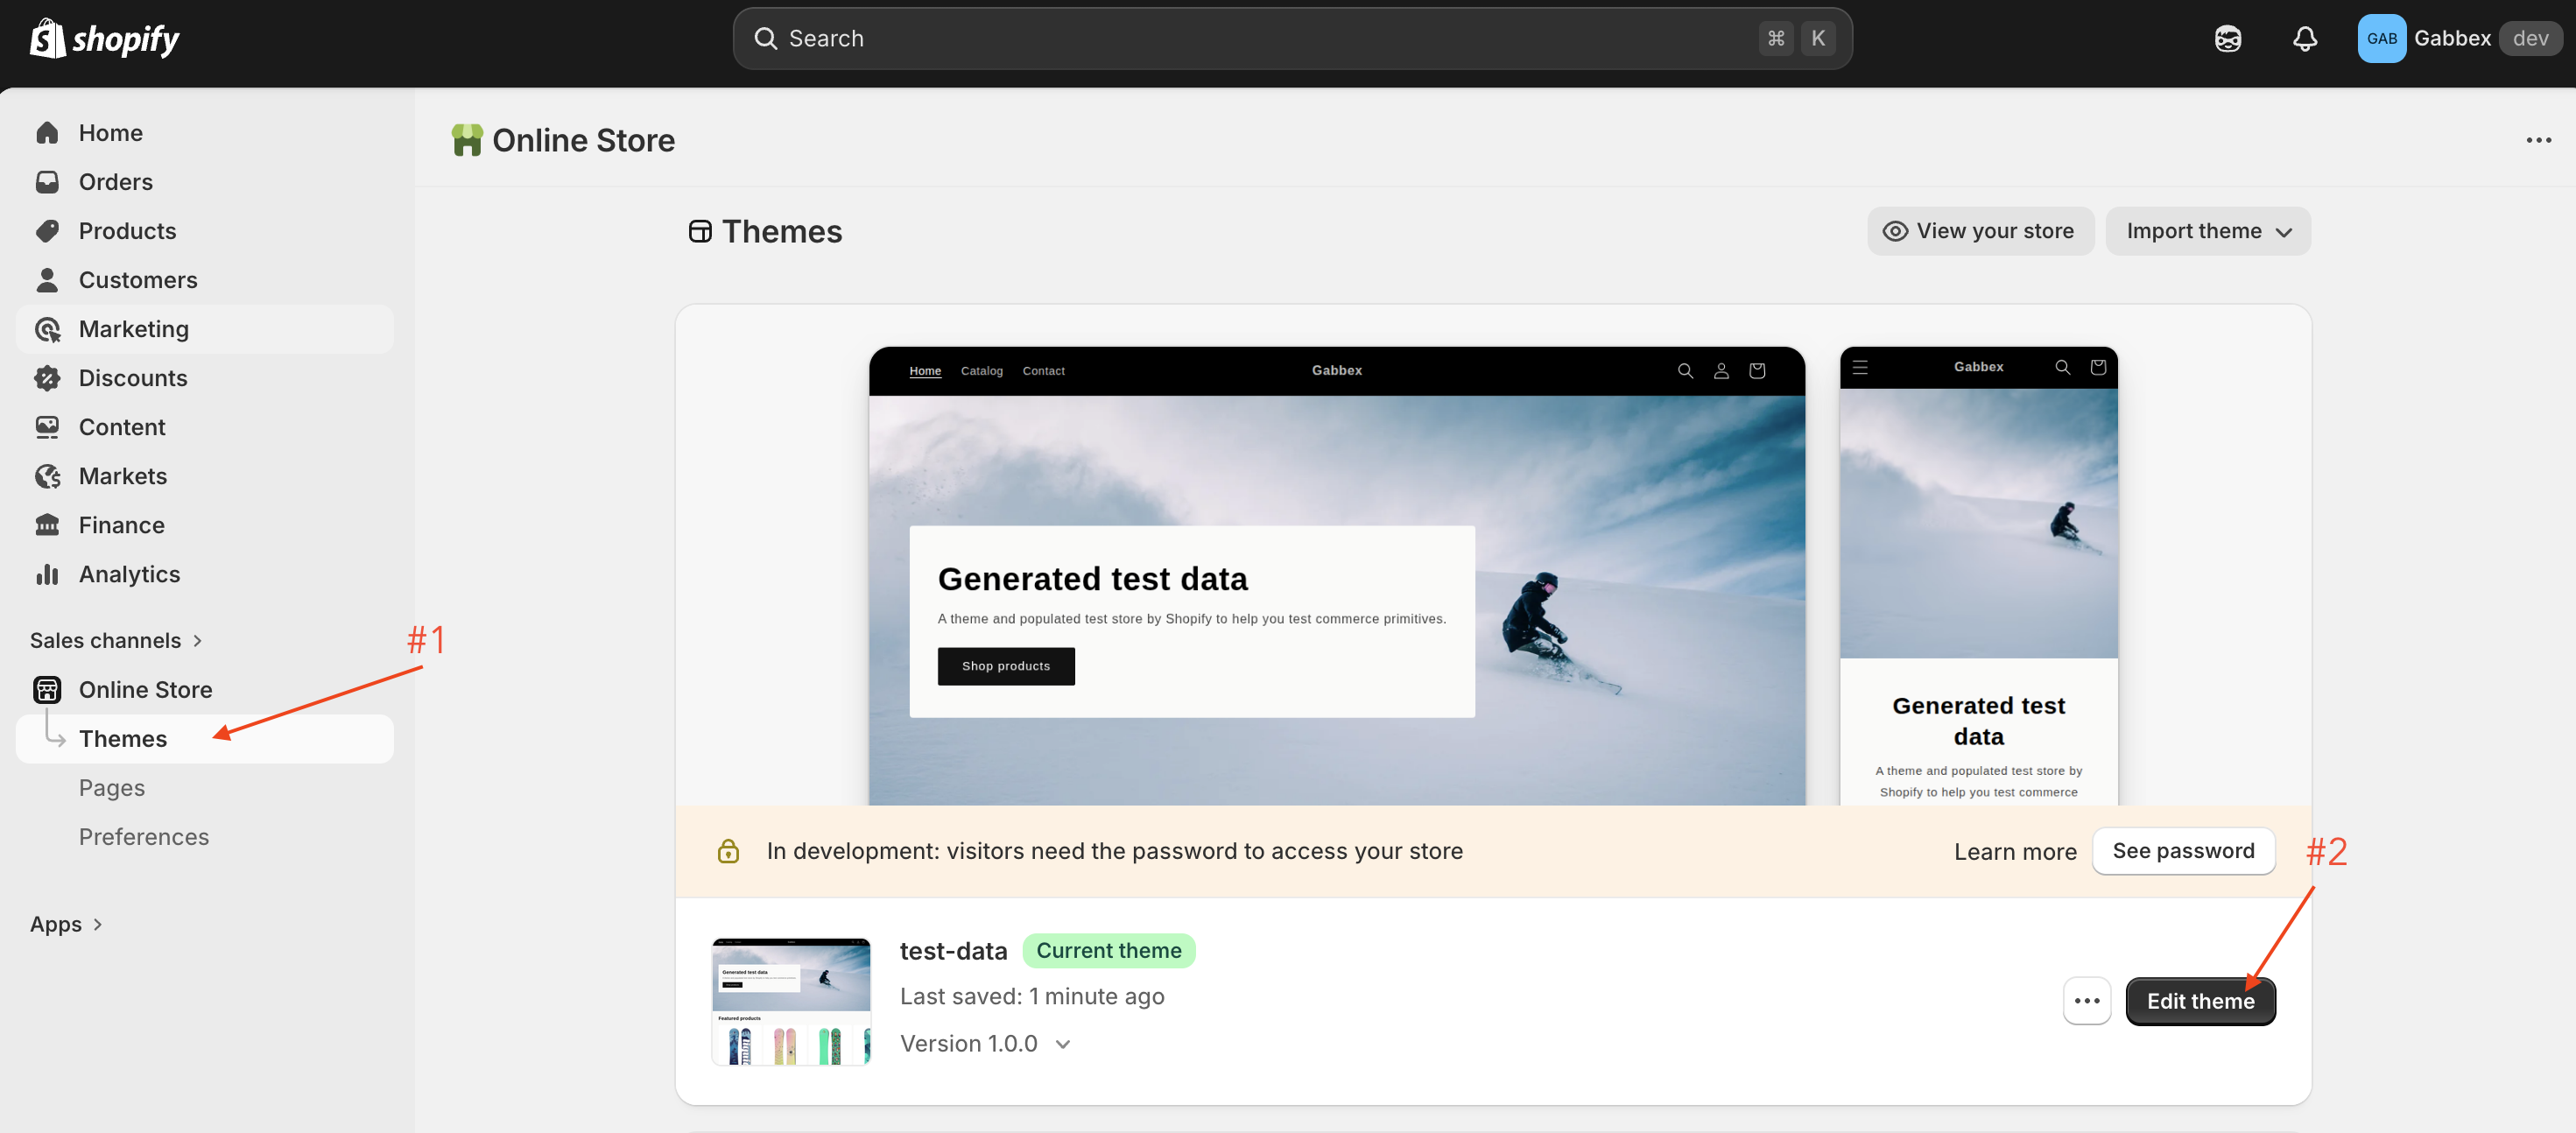
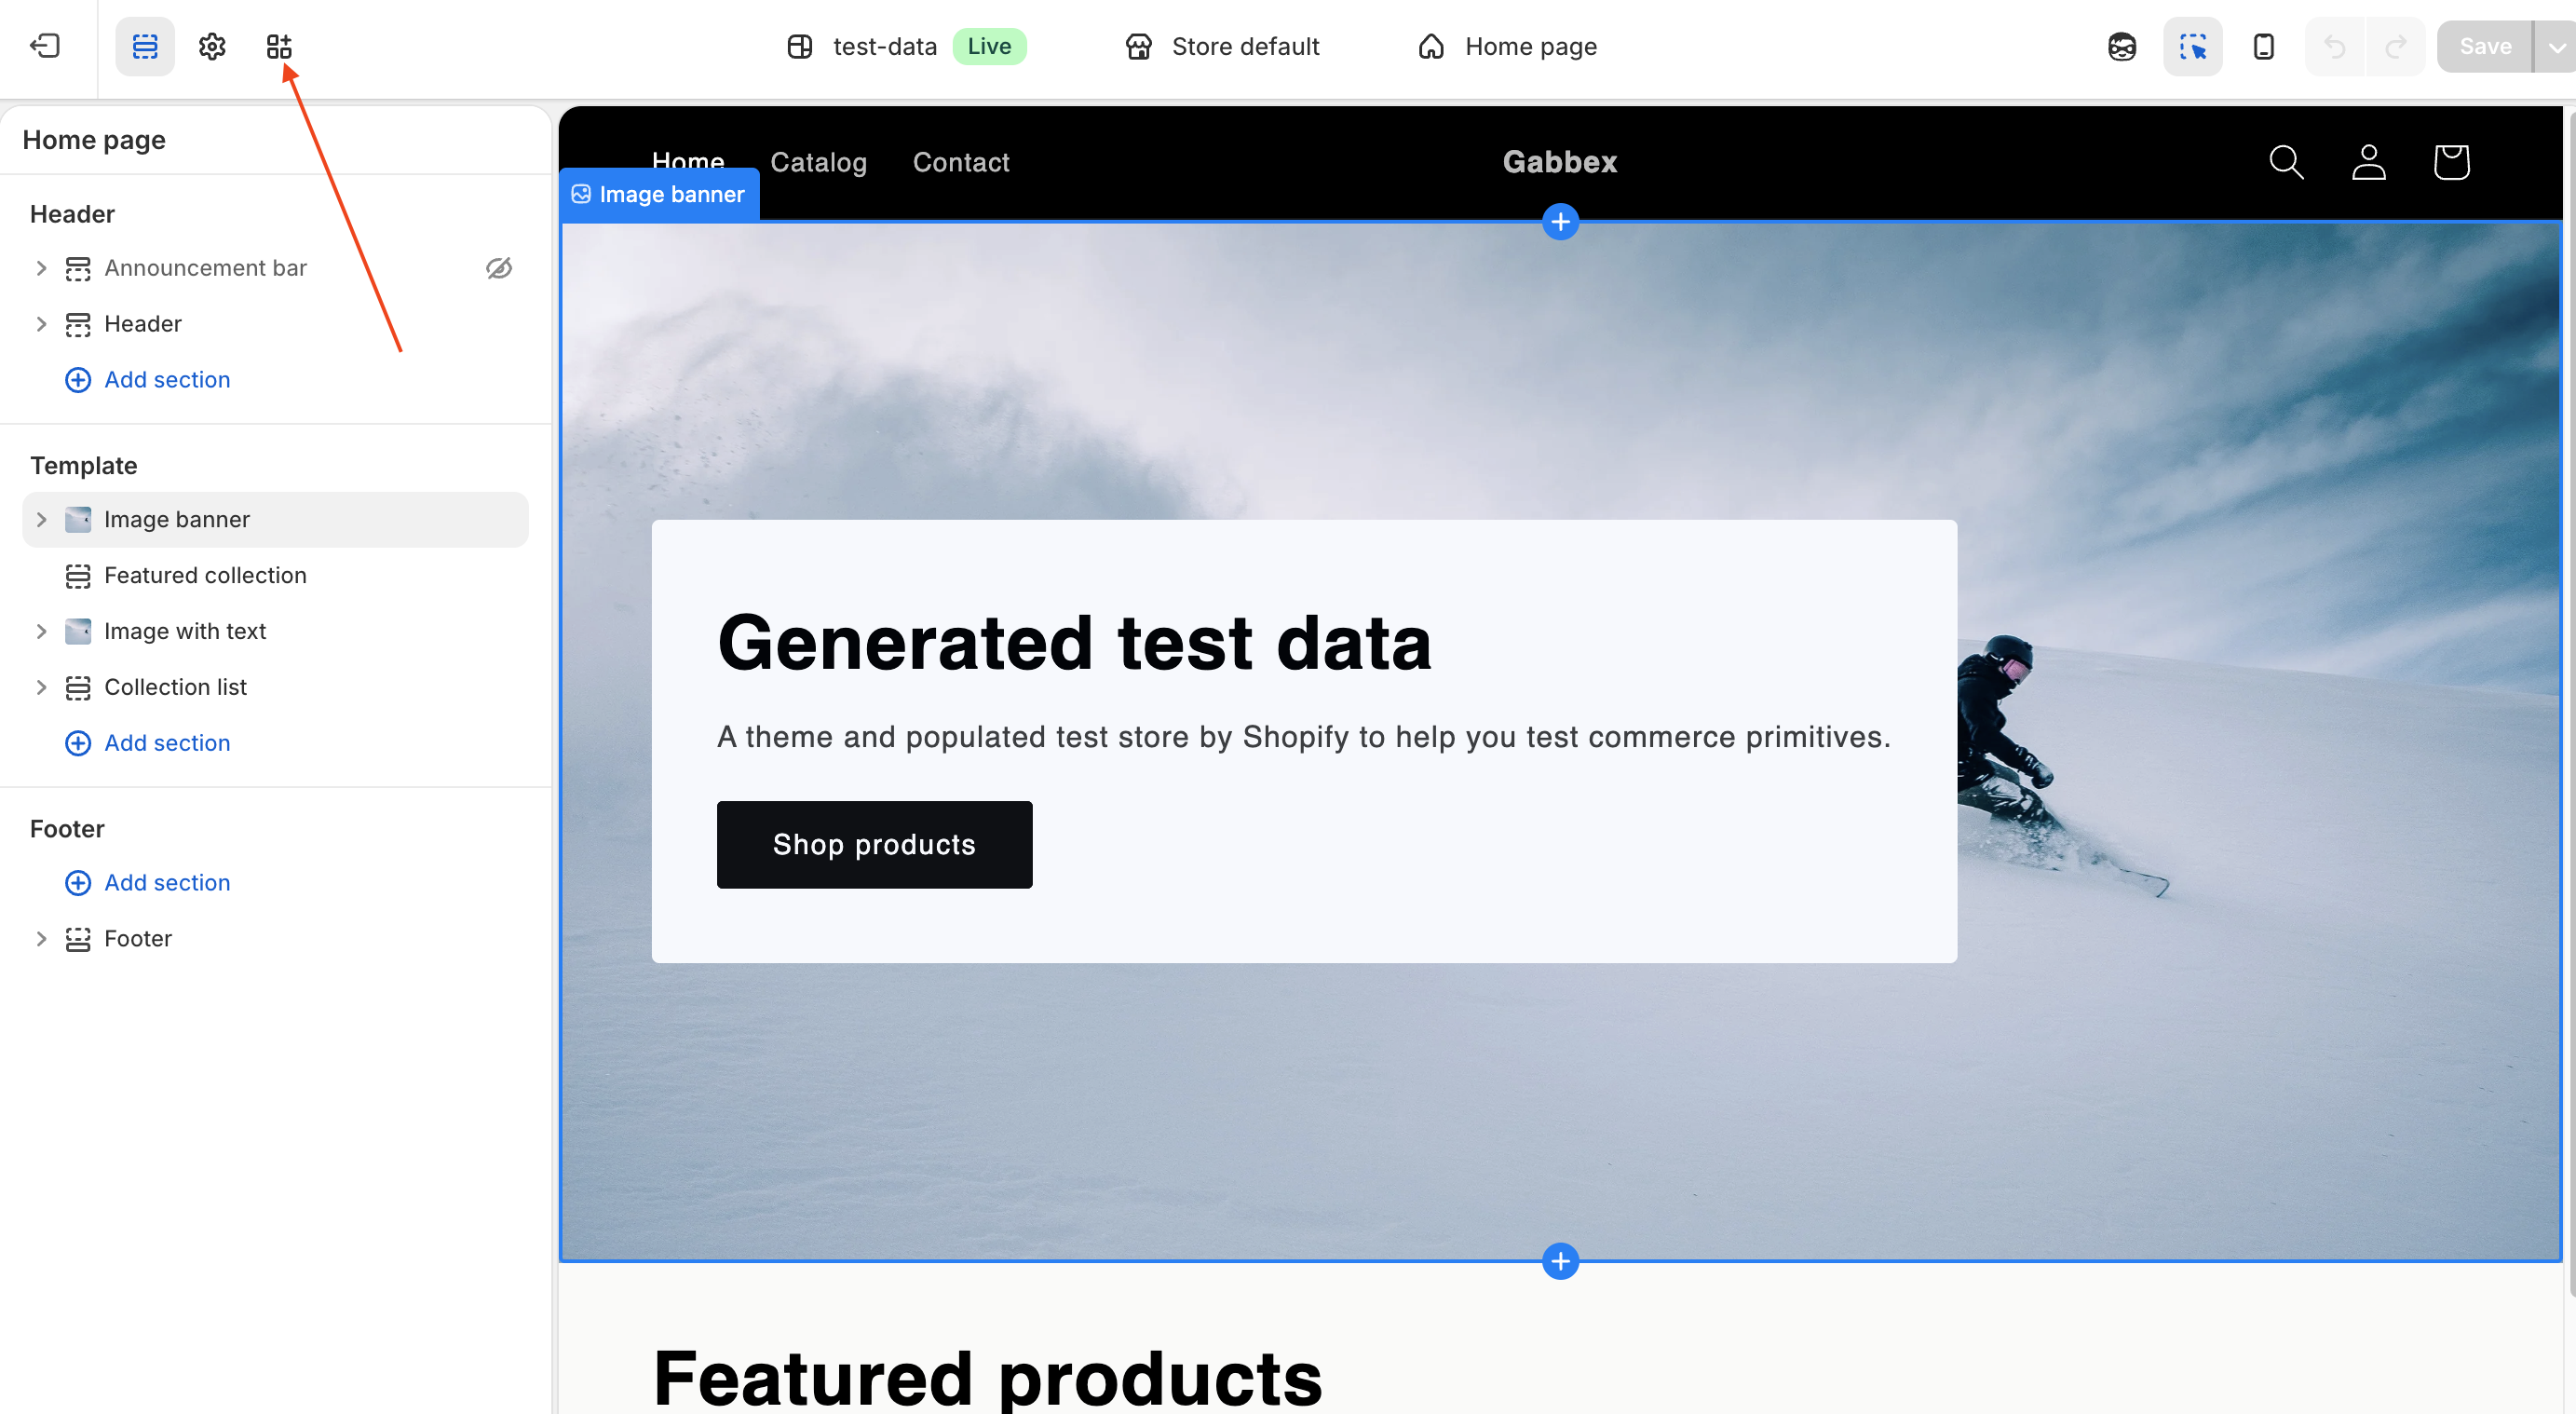
Go to App embeds
In the theme editor, open the left sidebar and click App embeds. You will see a list of apps that can add features to your storefront — Gabbex Chat is in this list.
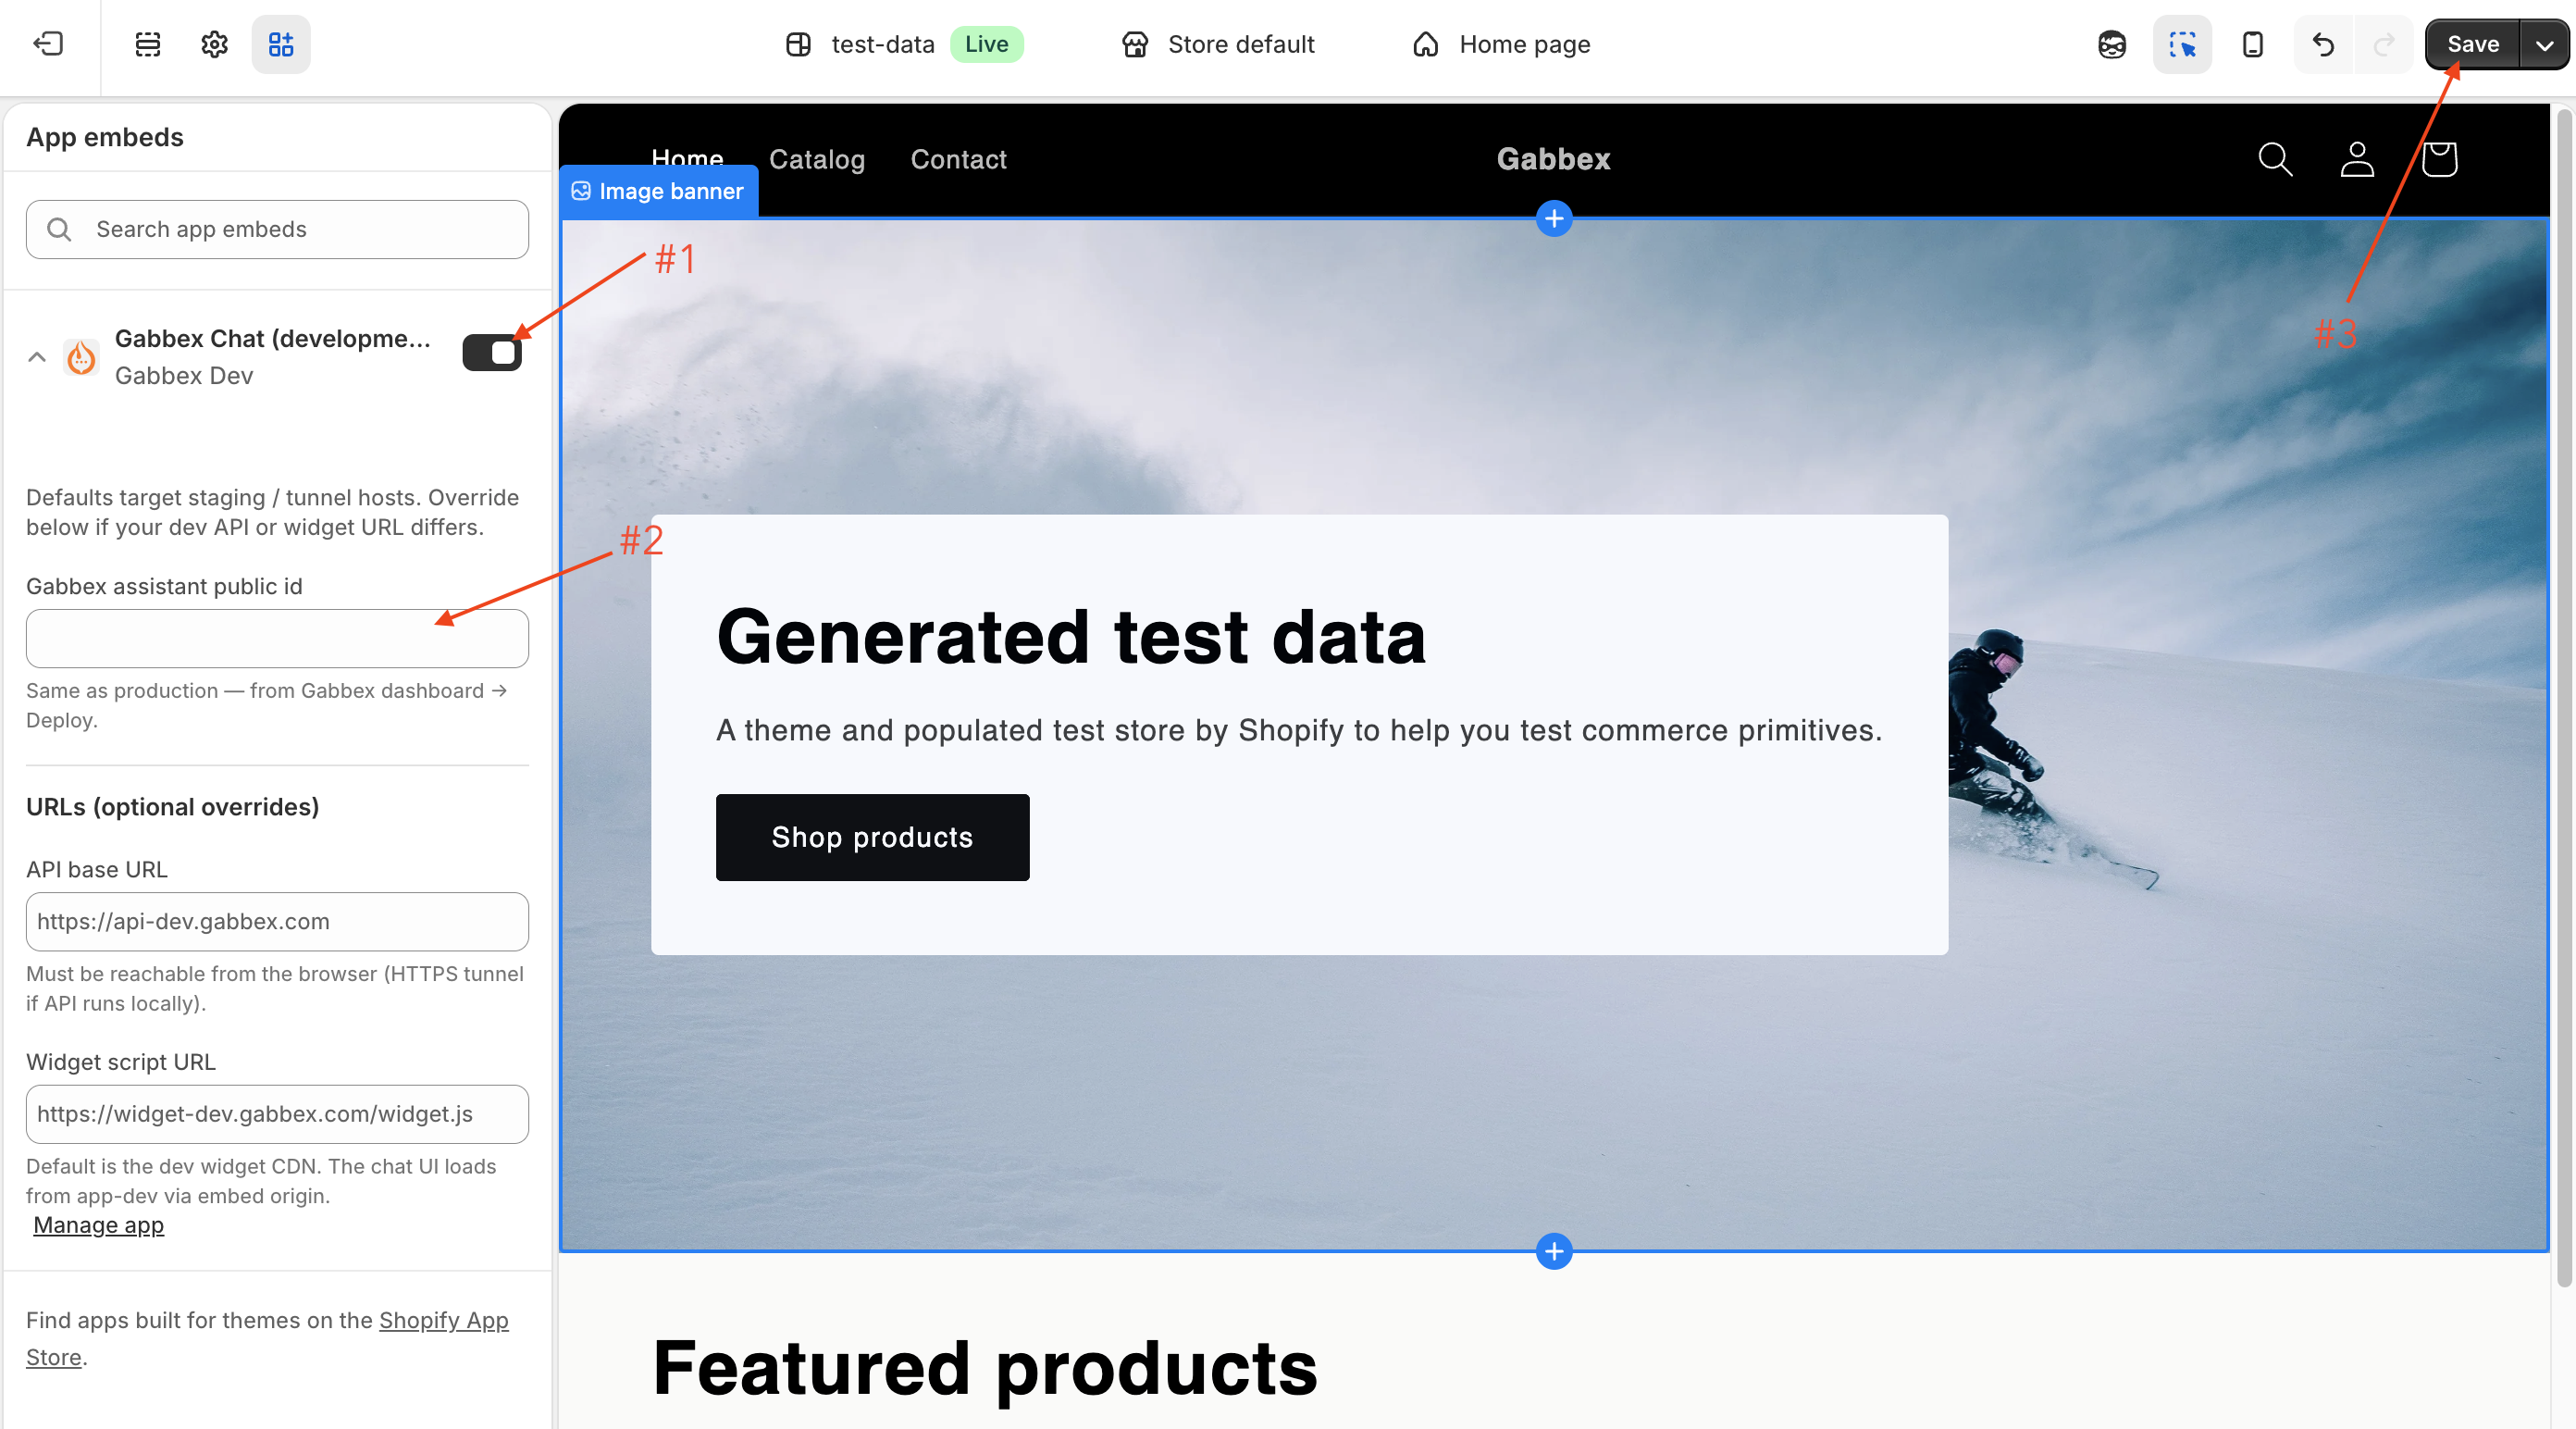
Enter the assistant public id
Find Gabbex Chat, switch it on, then paste your assistant's public id from Gabbex Deploy. Leave other fields on the defaults unless support told you to change them. Click Save.
For shoppers who are signed in, the Gabbex Chat embed adds
data-gabbex-visitor-name and data-gabbex-visitor-email from their Shopify customer profile, plus data-gabbex-shopify-customer-id so Gabbex can tie the conversation to the same person across visits. You do not need to edit Liquid for that behavior — the app block supplies it when customer is present.
More detail is on the main Integration · Website embed page under Optional: prefill lead contact.
Quick test
Open your real storefront URL, launch the chat, send "Hello." You should get a reply from your assistant.
Next steps
- Add website sources, FAQs, and policies in Gabbex so answers match what you sell.
- With Shopify connected, your assistant can answer using your catalog and orders where your plan allows. Try a real product or order when you can.
- If Gabbex asks for new permissions later, open the app in Shopify and approve the update so everything keeps working.
Messenger, WhatsApp, and the web widget
The same assistant can also use Web, Messenger, and WhatsApp — each is a separate channel in Gabbex.
If something goes wrong
- "Something went wrong" when connecting: Sign in to Gabbex in a normal browser window and use Connect Shopify from there. If it still fails, contact support with a screenshot.
- Upgrade message: The Shopify channel needs a Spark, Core, or Scale plan in Gabbex.
- No chat on the store: Is Gabbex Chat turned on under App embeds? Did you paste the id from Deploy and save the theme? Check your real store link, not only the theme preview.
- Chat works but the browser shows warnings: Note the exact message and contact Gabbex support — we can help with strict security headers or third-party scripts on your theme.
- Wrong store linked: In Gabbex, disconnect Shopify and connect again while logged into the correct Shopify account.